AI Configuration
Configure AI models, providers, and custom agents.
Model Selection
Quick Model Switcher
A compact model switcher is embedded directly in the chat interface. Click the model name in the prompt area or chat header to open the quick-select popover:
| Item | Description |
|---|---|
| Active model | Shown at the top with a checkmark. Click the star icon to add or remove from favorites. |
| Favorites | Pinned models always appear first in the list. |
| Recents | Last 10 used models appear below favorites (excluding the active one and any favorites). |
| Variants | Some models offer tier options (e.g., fast or pro). Variant items are highlighted and show a checkmark on the active selection. |
| More models | Opens the full model browser when you need a model not in recents or favorites. |
Favorites, recents, and variant choices are stored in OpenCode's own state file (.opencode/state/opencode/model.json in the workspace), so they are shared with the OpenCode TUI and survive Manager restarts. The active model itself is not persisted: on page load it resolves the same way the OpenCode TUI does — the model set in opencode.json, otherwise your most recent valid model, otherwise the provider default. A model you pick during a session stays active until the page is reloaded.
Per-Agent and Per-Session Models
Each agent can declare its own model in opencode.json, which becomes that agent's default. When you open an existing session, the model, agent, and variant used by its last message are restored from the session itself, so switching between sessions keeps each one's selection.
Full Model Browser
To browse all available models:
- Click More models in the quick-select popover
- Filter by provider or search by name
- Click a model to select it
Changing Models Mid-Session
You can switch models at any point during a session without losing context. The new model is used for all subsequent messages.
Providers
Configure API keys or OAuth for AI providers.
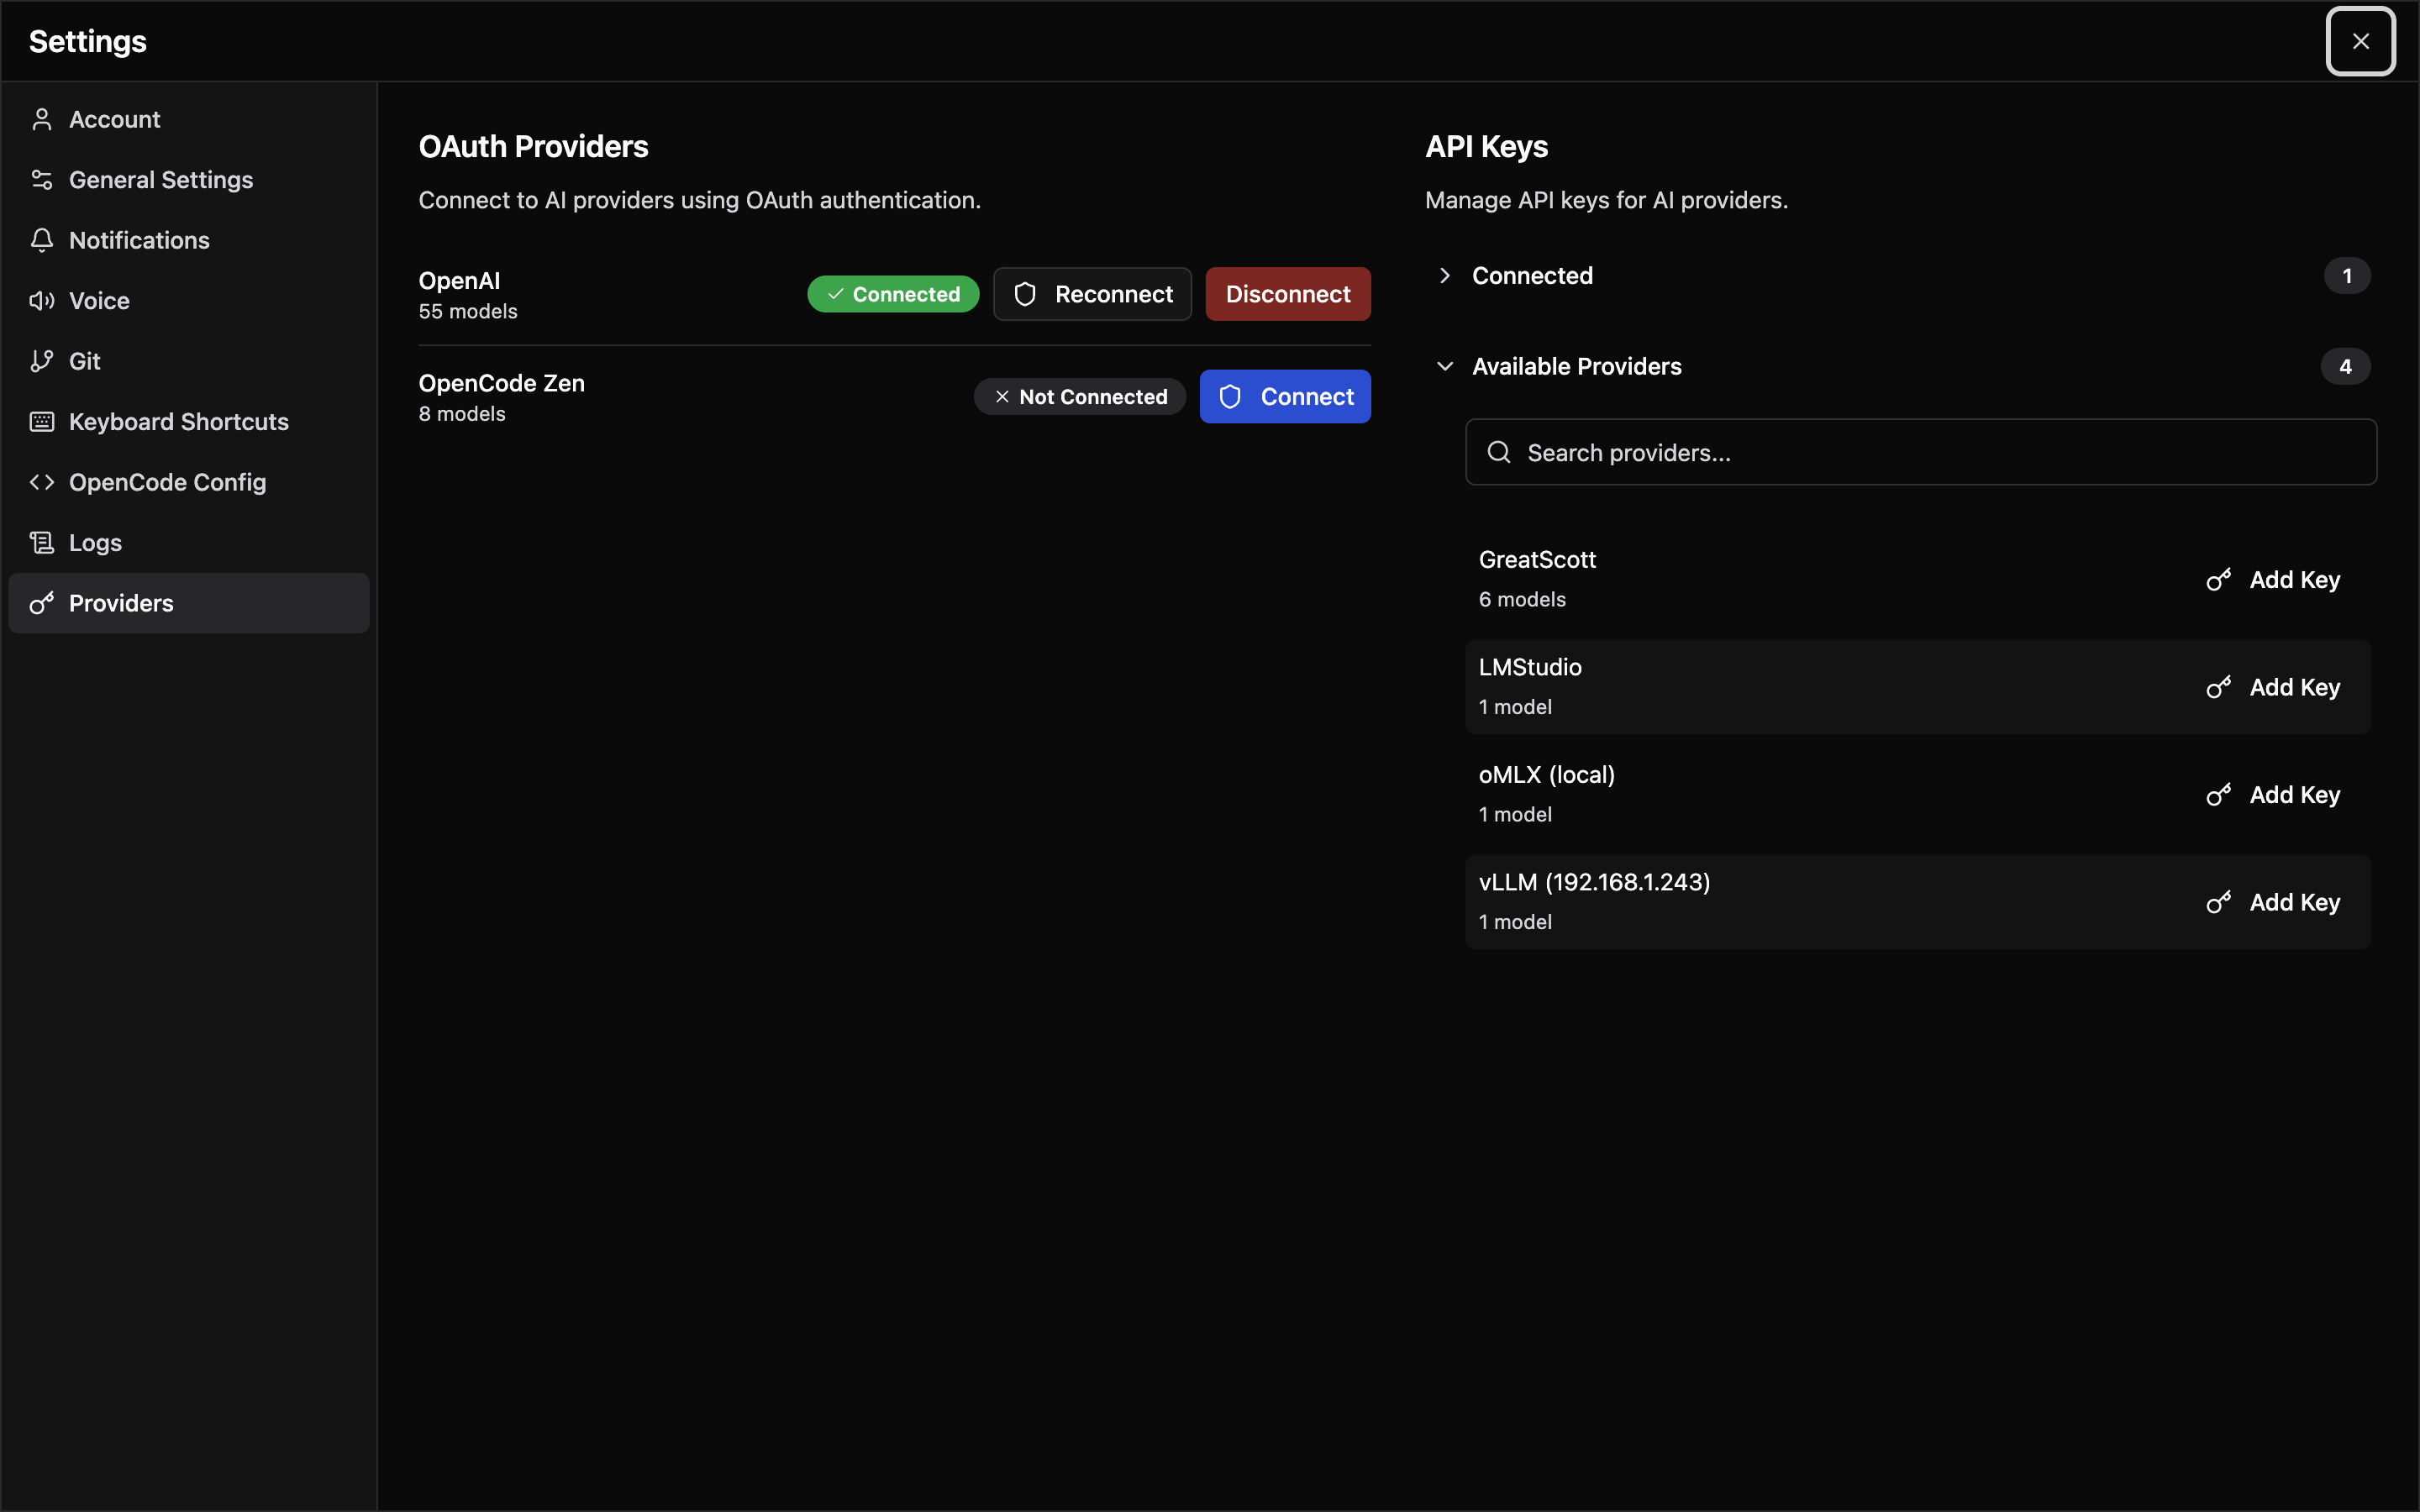
API Key Method
- Go to Settings > Providers
- Select a provider (OpenAI, Anthropic, etc.)
- Enter your API key
- Click Save
OAuth Method
For providers that support OAuth (Anthropic, GitHub Copilot):
- Go to Settings > Providers
- Under OAuth Providers, click Connect (or Reconnect) on the provider
- In the Connect to
dialog, choose an authentication method - Complete the flow:
- Browser-based methods open the provider's sign-in page
- Code-based methods show an Authorization Code field; paste the code and click Complete Authentication
Testing Credentials
After adding credentials:
- Open a chat session and click the model selector
- Models from that provider should appear
- Select a model and try sending a message
If models don't appear, verify your API key and check for errors.
Custom Agents
Create specialized AI agents with custom configurations.
Creating an Agent
-
Go to Settings → OpenCode Config → Agents
-
Click Add Agent
-
Configure:
- Name - Display name for the agent
- Description - What this agent does
- System Prompt - Instructions for the AI
- Default Model - Model to use
- Tools Configuration - Toggle the built-in Write, Edit, Bash, and Web Fetch tools
-
Click Save
System Prompt Tips
Write effective system prompts:
You are a code review expert specializing in TypeScript and React.

When reviewing code:
1. Check for type safety issues
2. Look for potential bugs
3. Suggest performance improvements
4. Ensure consistent code style

Be concise but thorough. Prioritize issues by severity.
Tool Permissions
The Tools Configuration section toggles each built-in tool on or off:
- Write - Create and modify files
- Edit - Edit existing files
- Bash - Run shell commands
- Web Fetch - Fetch content from the web
The Permissions section sets each of Edit, Bash, and Web Fetch to Ask, Allow, or Deny.
This is useful for:
- Security-focused agents that shouldn't modify files
- Research agents that only need read access
- Specialized agents for specific tasks
Using Custom Agents
- Start a new session
- Click the agent selector
- Choose your custom agent
- Chat with the specialized agent
Context Usage
Monitor token usage with the context indicator:
- Progress bar shows current usage
- Updates as conversation grows
- Warning when approaching limits
Managing Context
When context is running low:
- Use
/compactto summarize history - Start a new session with
/new - Be more concise in prompts
- Remove unnecessary file mentions
Context Limits
Different models have different context limits. Check your provider's documentation for exact limits per model.